
How to Use Apple Pay: Apple Pay has revolutionized the way we make payments, providing a seamless, secure, and convenient way to pay with just a tap. Whether you’re shopping in-store, online, or sending money to friends, Apple Pay offers a fast and easy payment method that integrates perfectly with your iPhone, Apple Watch, or other Apple devices. In this guide, we’ll walk you through the steps on how to use Apple Pay effectively, ensuring you can take full advantage of this powerful tool.
Understanding how to use Apple Pay starts with setting it up on your device, and once you’ve mastered that, you’ll be able to use it for everyday purchases, whether you’re at a physical store or browsing online. Not only does it simplify transactions, but it also enhances your security by using advanced encryption and authentication methods. By the end of this article, you’ll feel confident using Apple Pay in any scenario, whether it’s paying for groceries or buying that new gadget you’ve been eyeing.
Let’s dive into the details on how to get started with Apple Pay, how to make payments, and some tips and tricks to make the most out of this payment method.
Setting Up Apple Pay on Your Device
Before you can start using Apple Pay, you’ll need to set it up on your device. The process is straightforward and takes just a few minutes.
- Open the Wallet App: On your iPhone, open the Wallet app, which is pre-installed on all Apple devices.
- Add a Card: Tap on the “+” symbol to add a new card. You can either use the camera to scan your card or enter the details manually.
- Verification: After entering your card details, your bank or card issuer will verify the information. This may involve receiving a code via text or email, or contacting your bank directly.
- Complete Setup: Once verified, your card will be added to Apple Pay, and you’re ready to go.
If you have an Apple Watch, you can also add your card through the Watch app on your iPhone. Simply follow the same steps, and you’ll be able to use Apple Pay directly from your wrist.
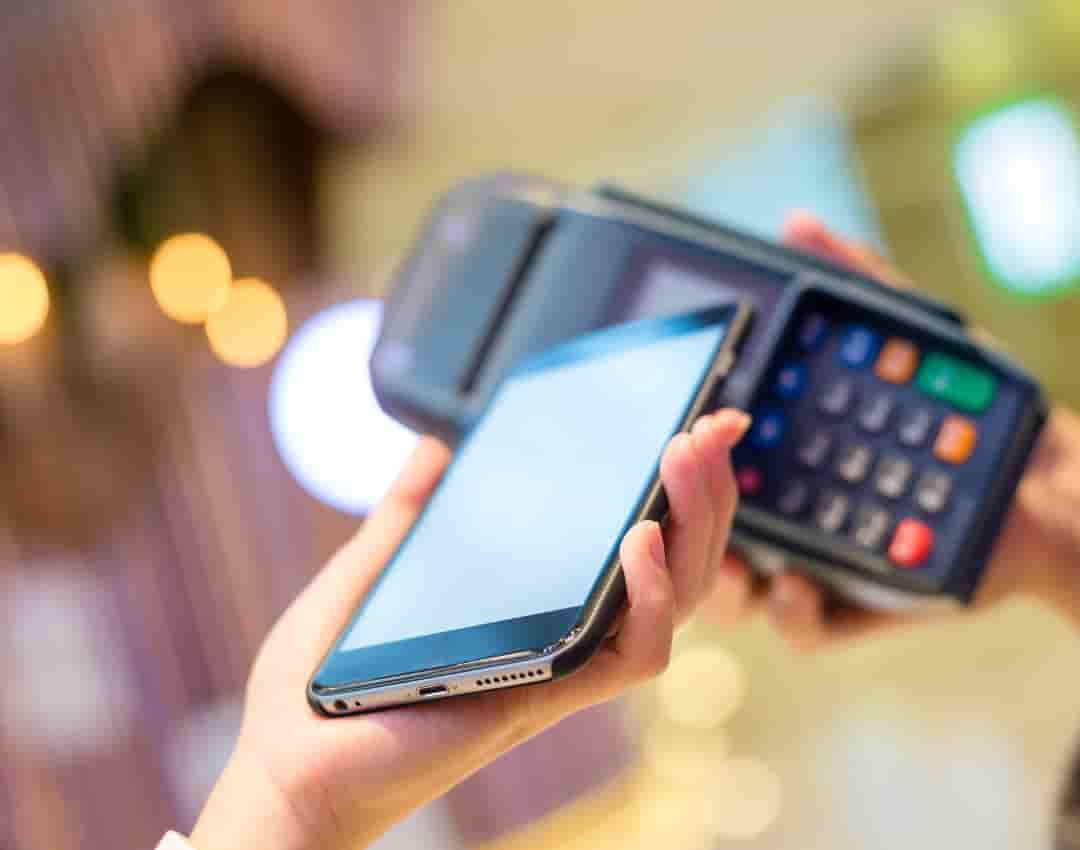
How to Use Apple Pay: Making Payments in Stores
One of the most convenient aspects of Apple Pay is the ability to make quick, contactless payments in stores.
- Look for the Apple Pay or Contactless Symbol: Most stores that accept Apple Pay will have a symbol displayed near the payment terminal.
- Use Face ID or Touch ID: When you’re ready to pay, double-click the side button on your iPhone or Apple Watch to activate Apple Pay. Use Face ID or Touch ID to authenticate the payment.
- Hold Near the Reader: Hold your device near the payment terminal. A subtle vibration and a beep will confirm that your payment was successful.
Apple Pay is accepted at millions of locations worldwide, making it a versatile option whether you’re buying coffee, groceries, or even paying for public transport.
Using Apple Pay Online and In Apps
Apple Pay isn’t limited to physical stores; it also works seamlessly for online purchases and within apps.
- Check for Apple Pay at Checkout: When shopping online or in an app, look for the Apple Pay option during checkout.
- Confirm Payment: Once you’ve selected Apple Pay, you’ll be prompted to confirm the payment using Face ID, Touch ID, or your passcode.
- Done: After confirmation, your payment will be processed instantly, and you’ll receive a receipt in your email or through the app.
This feature is especially useful for frequent online shoppers, as it eliminates the need to enter your card details every time, speeding up the checkout process significantly.
Sending and Receiving Money with Apple Pay
Apple Pay also allows you to send and receive money directly from friends and family through the Messages app, making it a convenient way to split bills or repay someone.
- Open Messages: Start a conversation with the person you want to send money to.
- Tap the Apple Pay Button: You’ll find the Apple Pay button within the app drawer in Messages.
- Enter the Amount: Input the amount you wish to send and confirm the payment using Face ID, Touch ID, or your passcode.
- Send: Once confirmed, the money will be sent instantly. The recipient can then use the money within their Wallet app or transfer it to their bank account.
This peer-to-peer payment feature is a game-changer for those who frequently share expenses with others.
Security and Privacy with Apple Pay
Security is one of the top priorities for Apple Pay. When you use Apple Pay, your actual card numbers are not stored on your device or on Apple servers. Instead, a unique Device Account Number is assigned, encrypted, and securely stored in the Secure Element, a dedicated chip in your device. Each transaction is authorized with a one-time dynamic security code, making it far more secure than using physical cards.
Additionally, Apple Pay requires your authentication (Face ID, Touch ID, or passcode) before a payment is made, adding an extra layer of security. If your device is ever lost or stolen, you can easily suspend Apple Pay using the Find My app.
Managing Your Apple Pay Settings
You can easily manage your Apple Pay settings through the Wallet app. This includes changing your default card, viewing your recent transactions, and updating your card information.
- Change Default Card: If you have multiple cards in Apple Pay, you can set one as the default by dragging it to the front of the stack in the Wallet app.
- View Transactions: Tap on a card in the Wallet app to see recent transactions, including purchases made with Apple Pay.
- Update Card Information: If your card expires or you get a new one, you can update the details in the Wallet app without having to remove and re-add the card.
These settings make it easy to keep your payment methods up to date and organized.
Tips and Tricks for Using Apple Pay
To make the most out of Apple Pay, here are a few tips and tricks:
- Use Apple Pay Rewards: Some banks and card issuers offer rewards or cashback when you use Apple Pay. Check with your bank to see if you can earn extra perks.
- Set Up Express Transit: In certain cities, you can use Apple Pay for public transportation without needing to unlock your device. This feature is called Express Transit and can be set up in the Wallet app.
- Use Siri Shortcuts: You can set up Siri Shortcuts to quickly access Apple Pay, such as paying a friend or checking your balance.
These tips can enhance your experience and make using Apple Pay even more convenient.
Troubleshooting Common Issues
While Apple Pay is generally very reliable, you might occasionally encounter issues. Here’s how to troubleshoot some common problems:
- Card Not Adding: If you’re having trouble adding a card, make sure your device is updated to the latest iOS version, and that your bank supports Apple Pay. Sometimes, restarting your device can resolve the issue.
- Payment Declined: If a payment is declined, check that your card information is correct and that you have sufficient funds. You may also need to contact your bank if the problem persists.
- Device Not Recognized: If your device isn’t recognized at the payment terminal, try holding it closer or adjusting the angle. If that doesn’t work, restarting your device may help.
- https://support.apple.com/apple-pay
Apple Pay has become an essential tool for many, offering a convenient and secure way to handle everyday transactions. Whether you’re shopping in-store, online, or sending money to friends, knowing how to use Apple Pay can simplify your financial life. By following the steps outlined in this guide, you’ll be well-equipped to use Apple Pay effectively, making your payments quick, easy, and secure.